Search This Blog

Wednesday, July 18, 2012

Chocolate and Ricotta Calzones...Oh so decadent!


For anyone with a sweet tooth, these sweet calzones are pretty hard to resist. Think of a Dark Chocolaty Cheesecake like filling, enveloped in a crispy pizza crust and then drizzled with White Chocolate Sauce. Truly decadent indeed, and definitely a wow factor to cap off an Italiano feast of pizza and pasta. The added bonus is that they smell so good baking in the oven and the anticipation is well worth the wait.
Ingredients, serves 6
6 x 75g balls of Pizza dough
300ml x Thickened Cream
200g x Dark Chocolate
200g x White Chocolate
300g x Ricotta cheese (The thick type works best)
200g x Cream Cheese
1 x Egg, separated and beaten
2tbsp x Caster Sugar
Directions
Preheat the oven to 230°C and place a pizza stone or oven tray to heat
Begin with the pizza dough rolled to about 4-5mm thickness
Use a plate or bowl to cut out circles of the dough

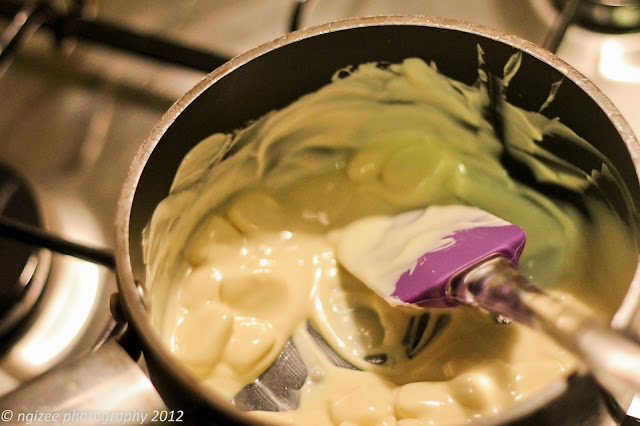
In a heavy saucepan, melt the white chocolate and gradually add half of the cream
Stir constantly until the mixture thickens to a sauce like consistency
Repeat the same steps with the dark chocolate in a clean saucepan

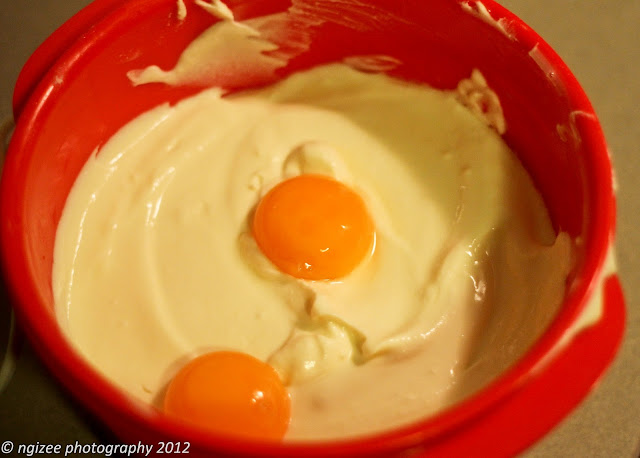
Blend the ricotta and cream cheese with the egg yolk and sugar until well combined

Place about 2-3 tablespoons of the cheese mixture in the lower half of the dough circle
Now repeat with the dark chocolate making sure not to overfill the calzone

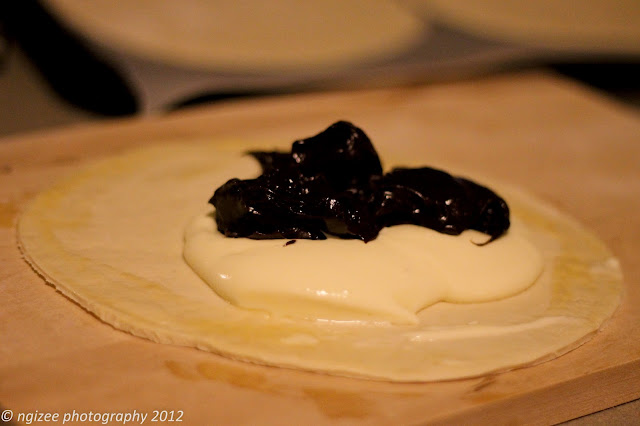
Brush the beaten egg white along the outer edge of the circle
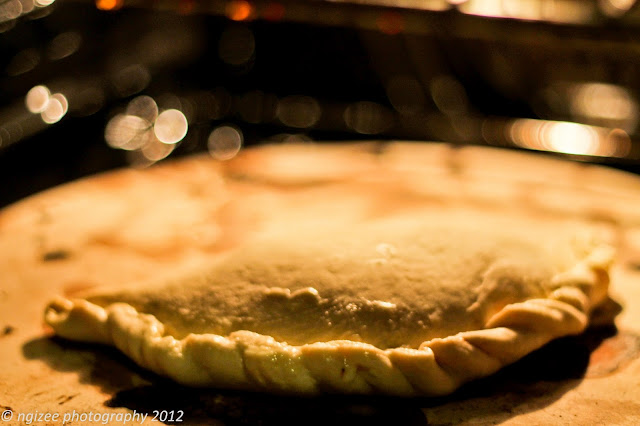
Fold the top half over the filled half into a semi-circle and seal by crimping along the edges
Brush more egg white wash over the tops
Place carefully in the hot oven straight onto the preheated stone or tray and bake for 10-12 minutes

Reheat the white chocolate sauce to a pouring consistency and drizzle generously over the calzone before serving them up, piping hot.

Saturday, July 14, 2012

Pizza...from scratch...

I have made plenty a pizza dough in my day; the good, the bad and the downright unusable excuses for a pizza base have ensued.  The ingredient list remains the same each time - flour+yeast+water plus a whole lotta kneading or run it in a mixer with dough hooks.  As easy as the latter sounds it is, without a doubt that the best pizza dough has always been the one you worked up a sweat, belting it into submission.
I have usually stuck to the basic pizza dough recipe every time and as mentioned it has had mixed outcomes.  In preparation for the big Italiano catering stint for my mate's birthday, I began searching for a new recipe to try out - as I am a stickler for perfection.  As if by magic, the Tuesday newspaper (Yes! I still read a newspaper!) had a food section dedicated to pizza.  In it was a write up and recipe from a highly recommended Melbourne pizzeria with branches in Prahran and Fitzroy, Ladro.  Read the article for some tips and inspiration right here 
The recipe from taste.com.au can be found here for Ladro's Pizza Dough recipe. I decided to go overboard a little and started with 2 kilos of tipo 00 flour and ended up with enough dough to make pizzas for a small army.  Luckily, I turned the excess dough into pizza scrolls sweet calzones for dessert. The recipe that follows will give you about 16 dinner plate size pizza bases.  
Start with 100g fresh yeast and 100g of tipo 00 flour


Add 100ml of tepid water and mix to a smooth batter.  Allow to stand for at least half an hour and the starter will get lively and form bubbles


Lay out 2kg of tipo 00 flour on a clean counter top and make a well in the centre.  Add the yeasty starter, 3 tbsp of salt and about a litre of tepid water.  Bring the dry and wet ingredients gradually together in a circular motion  
When the dough ball forms begin to knead it with your hands.  It's a bit of a buzz when you get this dough ball behaving.  It needs about 10-15 minutes of heavy duty kneading 


Use the palm of your hand to stretch the dough away from you, then fold back onto itself and repeat all over the ball.  You are looking for a stretchy elastic consistency.  This takes time but the reward is beautiful fluffy pizza crust


Place the dough in humid and draught-free place.  The pantry worked great for this baby!  Dust with extra flour and cover with a warm damp towel.  Dough will double in size so rest it for at least an hour 
An hour and a bit later and the dough has grown and is light and springy  to the touch.  Knock out the air by  lightly punching all over

Divide the dough into 100-110g balls.  This will yield about 16 balls.  Dust with flour and cover again with a warm damp towel.  This second proving will take about a hour and the dough will be ready to roll into perfect bases

Get your toppings ready by chopping into bit sizes that will cook quickly.  Don't go overboard with toppings as the minimalist approach will showcase the dough and pizza sauce (See recipe below)


I highly recommend using pizza stones in conventional  home ovens.  In this case I used metal trays lined with baking paper because I had a lot of pizzas to get in the small oven
The mix of toppings is only limited by your imagination.  Just get the things you love on to the sauced up base and whack in the oven at maximum heat for up to 15 minutes.  Check the base to ensure it is cooked through.

With pizza that looks this good, is it any wonder that it tops my list of favourite foods.  Just slice and serve


The first batch gets the approval from the birthday boy.  So good - it's almost poetic!
The bestest pizza sauce - never buy bottled stuff ever again
It would seem incomplete if all the trouble to get to the perfect dough for your pizzas was culminated with an application of store bought pizza sauce.  This recipe has been a winner for me from the start.  It's fresh and zingy, and the proof is in the taste of a simple Margherita pizza, on which it works wonders.
Ingredients, makes enough for 16 pizzas plus leftovers, can be frozen
2 tbsp x Olive Oil
6 x Garlic cloves
2 x Bay Leaves
4 x 400g cans x Diced Tomato (Imported Italian tomatoes, if you can source 'em)
1tsp x Dried Oregano
1tbsp x Sugar
4-5 x Sprigs of Basil, leaves picked
Directions
Heat the olive oil in a large heavy pot 
Add the garlic and bay leaves and stir for 30 seconds
Add entire contents of the canned tomatoes
Bring to the boil then add the oregano and sugar
Reduce heat and simmer for 1 hour stirring regularly so it does not burn
Sauce should reduce to about half and it will be thick and rich
Add the basil leaves in the last 5 minutes and stir through
You can use a stick blender to smooth out the sauce but I prefer it on the coarser side, use the back of a wooden spoon to crush any larger tomato pieces, if desired
Allow sauce to cool then spread it on the pizza bases and top it with your choice of faves!
Buono Appetito!

Friday, July 13, 2012

Pasta Bolognese...real Bologna style

A blog post for Bolognese seems quite redundant in a world where the nearest supermarket has an aisle dedicated to bottles and jars of ready-made so called pasta sauces.  Just add mince and stir through - Easy? Yes! Acceptable? Heck no! Just ask any Italian momma and they'd agree the true essence of the sauce is lost in translation somewhere between it's origin in Bologna, Italia to your local Woolies or Coles!  So in preparation for this very simple dish I had to make it complex, as I do, and take it back to the old, and true,way to prepare this much favoured classic dish.   
I have some golden rules when it comes to preparing this pasta sauce - and these are my rules now - they are not necessarily shared by and Foundation for the Preservation of Bolognese (or any actual existing body).

  1. Use a mixture of Beef and Pork mince (most true recipes ask just for beef)
  2. The sauce should simmer for at least 3 hours (slow cooked to build the flavours)
  3. It's a meat sauce not a sauce with (a little) meat
  4. Serve with Fettucini so that the sauce clings to the flat pasta (sorry Spag Bol lovers - you're doing it all wrong)

Ingredients, for a huge batch to feed about 10-12 people (scale down as required)
1kg x Beef Mince
1kg x Pork Mince
4tbsp x Olive Oil
250g x Pancetta
2 x Large Carrots
5 x Celery sticks
3 x Onions
750ml x White Wine
4 x 400g cans x Diced Tomato
Salt to taste 
Fettucini pasta, cooked al dente to serve
Parmesan to garnish
Directions
Coarsely grate the carrot, celery and onions
Grating is always good when someone else does it!


Add the oil to a heavy casserole pot and fry the pancetta gently 
Toss in the grated veggies and cook for 20-25 minutes until softened


Now add in the mince meat and stir through with a wooden spoon using the back of the spoon to mash any clumps
Cook the mince stirring constantly until browned and no pink bits remain
Pour in the wine and allow to reduce to a third
Now tip in the canned tomato and stir to combine 
Bring to a boil then adjust salt to taste
Reduce heat to low and allow to simmer uncovered for up to 3 hours, stirring frequently to prevent pot catching 


Sauce would have thickened and oil will begin to separate and float to the top
Adjust seasoning again
Serve immediately over a plate of piping hot fettucini (not spaghetti please!)
Garnish with grated parnesan cheese and serve


As you can see from the pics, Bolognese can be attractive too.  This recipe stays somewhat true to the original from Bologna. Its simple ingredients come together to build up its flavour in the method of cooking.  


This Bolognese is lovely and meaty and despite the short list of ingredients, is full of flavour and tastes better than any created from pasta sauce in a jar.  The secret is in the slow cooking which makes this recipe one to prepare for and cook ahead to really make it stand out.

Year Two - Italiano party catering


It’s been a while between blog posts, and this hasn’t been from a lack of any magic in the kitchen on my part.  A rather busy end of financial year run and climatic ends to projects that I have been managing at work during business hours has had me too exhausted to blog after hours.  I have been quite the neglecter and opted for sleep over script.  But the cooking has continued throughout and it’s time to kick this blog off for second year.  Yes it has been just over a year since I took the step from just conjuring concoctions in my kitchen, to publishing my words on food and the recipes that follow, to the internet…immortalised forever!!!
I kick started the cookery in July 2012 following up on a request from my best bud to cater for his birthday.  This was only to be a small gathering of under ten people, so nothing too major.  Being the health freak he is, I expected that he would chose a menu low in carbs, fat and all the other “no nos” frequently found in any dieter’s vocabularies.  Instead he threw me a curve ball and requested everyday Italian – Pasta Bolognese, Pizzas etc.etc.  I willingly obliged, no doubt.   As basic as the menu sounded, I was not going to make it any run-off-the-mill style experience.  Instead, what transpired was the most delicious Bolognese I can attest to creating and possibly eating, and a pizza dough that was beautifully crusty and the perfect base for some home-made goodness.  
Isn't that toaster a little too close too the stove...lol!!!
And because he has a massive sweet tooth, I couldn’t go past a chocolate and ricotta filled calzone, that just capped off a day of indulgence.  So keeping in the tradition of worldly cuisine themed weekends, we viaggio di Italia – or at least to a couple of the foodie regions of the country.   
Happy Birthday Cracker!!!