Search This Blog

Showing posts with label Indian. Show all posts

Monday, May 27, 2013

Red Lentil Dal with Curry leaves

Here's my ultimate favourite dal recipe, and being the one that I have served up to a group of twenty or so attendees at a lunch gathering at work, it has definitely been given the thumbs up.  Once again, as with most of my Indian vegetarian dishes, simplicity is at this recipe's core.  From start to finish you should be able to whip up this dal in under 30 minutes and have a delicious dinner ready in no time.  And given that it is winter at the moment, nothing is quite as satisfying than this warm bowl of nutritional goodness to warm you up on the inside.
Ingredients
250g x Red Lentils, washed and drained
1.25 litre x Water
1 x Onion, chopped coarsely
1 x dried Red Chilli
1 tsp x Turmeric
1 can x Tomato
1-2 tsp x Salt
1 tbsp x Garlic, crushed (about 3 cloves)
1 tbsp x Ginger, grated
1 tbsp x Cumin powder
2 tbsp x Vegetable oil (or Ghee)
1 tsp x Black mustard seed
3 sprigs x Curry leaves, picked
Directions
Tip the washed lentils and water into a large saucepan
Place onto the stove on high heat and add the onion, chilli, turmeric, tomato and salt
Bring to a gentle boil, removing any froth that rises to the top
Combine the garlic, ginger, cumin and mustard seed in a small bowl
When the lentils have softened remove the chilli and discard, 
Now reduce the heat to a low simmer 
Use a stick blender to process the dal into a coarse and runny paste
In a separate frying pan heat the oil or ghee and add the curry leaves carefully
Follow quickly with the garlic and ginger mixture
Stir gently for a minute or two or until the mixture is browned slightly
Tip the mixture and oil straight into the dal, stirring well to combine
Taste for salt, adjusting more if desired
Allow to simmer for 10-15 minutes then remove from heat
Dal will thicken slightly on standing
Serve with flatbreads or rice add extra red or green chlli if desired
Can be stored in a freezer for up to a month  


Aloo Bhaji - Spicy Potato Curry

This is by far one of the easiest and tastiest dishes that comes from the most simple ingredients.  Aloo bhaji or simply a dry potato curry is another one of those Indian favourites found at many snack vendors.  This is my wife's recipe which gets made quite regularly as it goes well as an accompainment dish with most basic Indian meals.  Strange as it may seem, this dish actually enjoyed at breakfast time with some of my favourite style of deep fried Indian breads - the Puri or Luchi as my mother-in-law calls it.  The light and crispy puri goes perfectly with this spicy potato melange that is a perfect pick-me-up kind of breakfast, if you know what I mean!
Now, while the ingredients list for this dish is quite short, don't be fooled as it does pack a punch of flavour.  It is extremely easy to prepare, being a breakfast dish and the most tedious part is cutting the potato into fine matchstick lengths so that they cook evenly, and above all quickly.  
Ingredients
5-6 medium size x Potatoes, washed and sliced into thin batons with the skin on
2 tbsp x Vegetable oil
2 x Onions, sliced thinly
2-3 x Red or green chillies (less if you want to keep the hotness down)
1 tsp x Coriander powder
1 tsp x Turmeric
1 scant tsp x Salt
Small cup of water
Coriander leaves to garnish (optional)
Directions
Slice the potato finely and place in a bowl of water to prevent them from oxydising and turning black

Place a large frying pan or wok on medium heat with the oil
Add the onion and chilli and fry gently for a few minutes until the onions are softened and browned
Drain the potato and pat dry with kitchen towel then add to the pan 
Quickly add the spice powders and use a rubber spatula or spoon to combine the spices with the potato
Be very gentle with the potato as you want it to maintain the long thin batons as best as possible
Pour in a little water and mix through gently
As this is a dry dish you do not need a gravy but still want to ensure there is enough moisture so the potato does not catch or burn at the bottom of the pan 
Lower the heat and place a lid on the pan and allow it to cook for 2-3 minutes
The steam from the dish will cook the potato very quickly, keep stirring occasionally so that it does not stick 
Test  a few strands of potato to check if they are done 
Remove from heat and serve with a garnish of fresh corainder leaves   

Tuesday, May 7, 2013

Curried Chick Pea and Potato - around 70 cents a serve!


It’s time to put up one of the easiest dishes that I know and love - Curried chick pea with potato is one of many snack dishes from India that fall under the collective name of “chaat” (pronounced chart).  I cooked it up as part of a lunch meal for 5 during my week-long challenge to Live Below the Line.  A group of my colleagues and I got together to cook for each other while sticking to a budget of eating for no more than $2 a day - that's all meals and snacks - all day!  It's towards a good cause to raise money for people in extreme poverty in countries like Cambodia and Papua New Guinea.  The money will help fund education and skills training to break the cycle of poverty in such countries.  Check out my page on the Live Below the Line website for all the details of this worthwhile charity and also to see how our team went each day.  Feel free to donate generously as the site will be accepting donations until July 31st 2013.
No more chatting, now back to the “chaat-ing”.  This dish was very inexpensive to say the least and has a surprisingly good kick of flavour too.  The dish costs just $3.06c – so that is a microscopic  61 cents per serve add 10 cents worth of flatbreads - and our bellies are nourished and filled thoroughly.
I have given the costs that incurred against the ingredients in the list that follows.  Try it, you won’t be disappointed – if anything, this dish is proof that we can cook up some really inexpensive meals, that don’t break the budget, and can still be nutritious and sustaining.

Ingredients, to serve 5
2 tbsp x Canola oil = 0.06c
4 x medium Potatoes = 0.40c
2 cans x Chick Peas, washed and drained (You can choose to use the dried ones but for the sake of time I have used the canned ones) = $1.79c
3 x onions, sliced = 3 x 0.5c (I got these at 60c for a kilo – so really cheap!)
2 x Garlic cloves, crushed = 0.10c
1 inch x Ginger. grated = 0.10c
3 tbsp x Tomato paste = 0.12c  
2 tsp x Coriander powder = 0.08c
2 tsp x Cumin powder = 0.08c
1 tsp x Turmeric powder = 0.04c
½ tsp x Chilli powder = 0.01c
1 tsp x Salt = 0.04c
3 Fresh chillies, deseeded and chopped = 0.02c
2 tsp x Coriander leaves chopped = 0.25c
Water as required.
TOTAL curry cost = $3.06
We ate these with home-made flatbreads which costed 0.50c for 500g of Wholemeal flour
TOTAL Meal = $3.56c
Directions
Place 1 tbsp of the oil into a heavy pan and heat on medium
Add the sliced onions and fry for 5 minutes until soft 
Place enough water to cover the potatoes into a saucepan and boil until potatoes are done
When cooled, peel and chop potatoes into rough cubes, reserve for later
Once onions are softened, add in the garlic, ginger and tomato paste and fry for 3 minutes, stirring constantly 
Place the cooked down mixture into a blender and allow to cool slightly
Process to a thick smooth paste - this is the curry paste
Clean out and dry the pan then return to the heat with the remaining tablespoon of oil
Add the dry spices and chick peas stirring well to combine 
Now add in the curry paste and a little water 
Stir through to completely coat the chick peas  
Add in the cooked potatoes from earlier
Stir through and allow to simmer on low heat for about 10 minutes
Add extra water as required to ensure that a thick gravy remains
Do not let the curry dry out
To serve place the curry into a bowl and garnish with chopped chilli and coriander


In India this dish is usually enjoyed with deep fried "purees" which are basically made up from plain flour mixed water into a dough then rolled flat and finally fried nice and crispy.
For the more frugal (as this week has been for us) I highly recommend flatbreads or "chaapatis" with this dish as they go together perfectly
Ingredients and directions
Take 500g of wholemeal flour (atta) and combine with boiling water into a workable dough - use a wooden spoon to do this
Knead the dough into a 25 equal balls
Use a rolling pin to roll these out to as flat as possible - thin but not see through
Heat a heavy frypan (unless you have an Indian "tawa" as in my pic) on medium to high heat 
Cook the flatbreads for a minute on each side but do not allow to burn
Eat them fresh with any curries or dahl dishes 
They are light and delicious and at 50 cents for the entire batch - a very cheap alternative to regular carbohydrate accompaniments - especially the ones that cost so much from a Indian restaurant!     

Monday, November 19, 2012

Lamb Rogan Josh


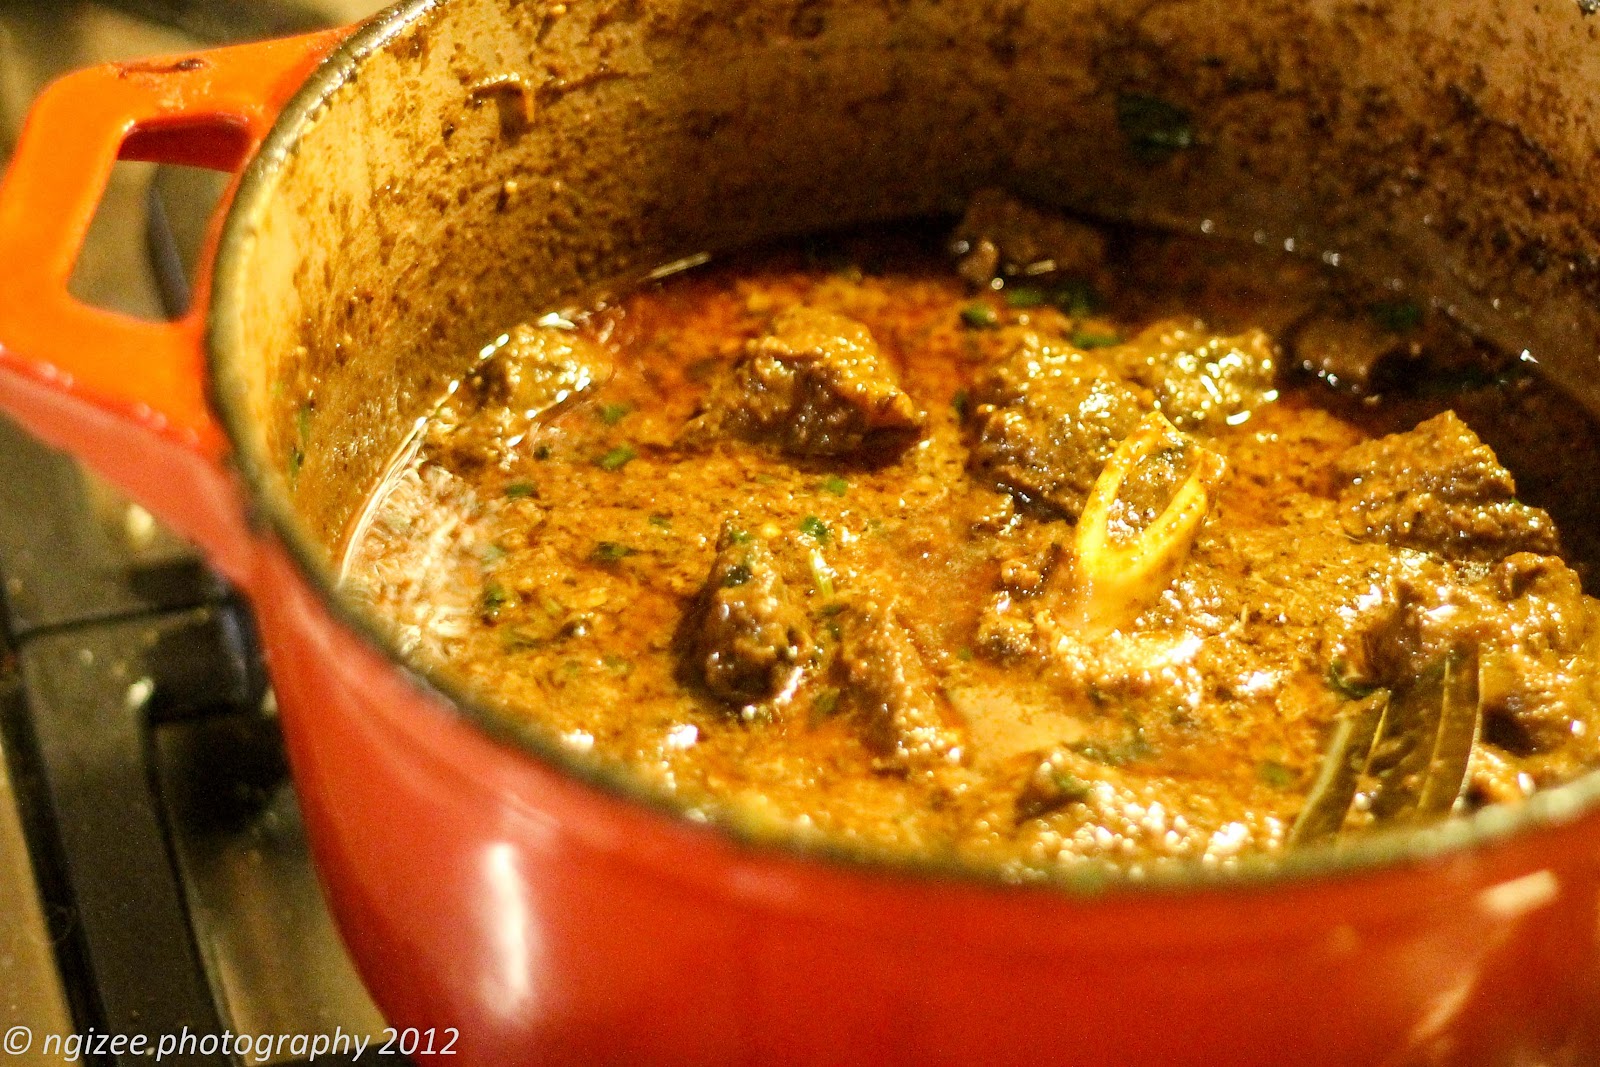
Some may regard Rogan Josh as the epitome of Indian Lamb curries.  You would be hard bent not to find it as a regular offering at your local Indian takeaway or restaurant menu.  It is the Butter Chicken of lamb dishes, for the Western world anyway!  Obviously due to its popularity, the dish has gone through countless iterations and ingredients can vary slightly, depending on who you speak to. The origins of the dish are notably from Persia and it was introduced to the Mogul kings in the Kashmir region of India.  Persian influenced dishes are favourably sweeter that the usual hot curries conjured up in the sub-continent's many kitchens.  Unlike many other dishes that get their sweetness from dried fruits and ultimately - the addition of sugar, Rogan Josh lends its sweet notes from the aromatic spices in its list of ingredients.  The name of the dish translates loosely to describe something "cooked in oil under intense heat".  I feel this is actually more of a misnomer than an explanation, as I am pretty sure most Indian curries are cooked in oil and under heat.  Nevertheless, the name has stuck and is firmly imprinted onto palates worldwide, none more so than an old colleague of mine who practically kept the local Indian takeaway in business by his frequent ordering of this dish repeatedly.  I promised him about a year ago I would get him a good recipe for Rogan Josh, so I hope it's not to late and he still reads my blog.  Here is my version of Rogan Josh or better named Sweet and Spicy Lamb - Nah! Doesn't have the same ring to it!   
Ingredients
1.2kg x Lamb, with bone, cut into rough chunks
1 tsp x Green Cardamom
2 pods x Black Cardamom
1 tsp x Black Peppercorns
1 tsp x Fennel Seeds
1 tsp x Cinnamon powder
3 whole x Dried Kashmiri Chillies (substitute 2 tsp x paprika)
2 tbsp x Ghee 
2 x Bay Leaves
2 pods x Black Cardamom
1 stick x Cinnamon
4 x Onions, finely chopped
4 cloves x Garlic, crushed
1 inch piece x Ginger, grated
2 tsp x Garam Masala
2 tsp x Sweet Paprika
1 tbsp x Salt
1 cup x Natural Yoghurt, extra half cup if required
1 cup x Water
1 bunch, Coriander leaves
Directions
Combine the seeds of the green and black cardamom with the peppercorns, fennel seed, cinnamon, and dry chillies in a spice grinder or mortar and pestle
Grind to a fine powder and rub over the lamb pieces, allow to stand for at least an hour

In a wide frypan or wok heat the ghee then add the bay leaf, cardamom and cinnamon, fry for 30 seconds
Add the onions and fry, stirring frequently, until they are dark and caramelised - do not burn!

Add the garlic and ginger and fry for another 2 minutes then add the paprika and salt
If the mixture starts to dry add a little water to retain a little moisture as you fry
Place the lamb into the wok, folding the curry mixture through it 
Pour in the yoghurt a little at a time, incorporating it gradually

Add a little water if required to just cover the lamb, stir to combine then bring to the boil

This is now the time to transfer the lamb and spices to a heavy pot to slow cook it in

Turn heat down and simmer covered for 1 hour and 15 minutes, stirring frequently to prevent the bottom catching

In the final 5 minutes of cooking add the coriander leaves and stir through.
Serve with piping hot naan bread or a bed of basmati rice. 

"As mentioned before there are a probably hundred ways to make Rogan Josh and who's to know the correct one - possibly a native!  This recipe follows the traditional spice and yoghurt ingredients typical of Persian cuisine.  Some variations include tomatoes and tomato paste which gives the dish a different taste again due to the acidity.  I have also come across a recipe which does not use onions and this impacts the overall sweetness."   


Monday, November 12, 2012

Prawn & Saag - an old favourite

I never say no to a prawn dish and when it comes to this curry or 'bhaji', it is another one of those special dishes from my childhood that I remember well.  Saag  pronounced "sarg" is the collective name of a number of green leaves that are wilted through curry dishes like this one.  The most common and familiar is probably spinach but there is vast array of others like mustard leaf and pumpkin leaf too.  Asian green grocers stock many of these varieties which they sell predominantly to their community since they know exactly how to use the different 'saags' in various dishes.  Lal Saag is the leaves of the Amaranth plant - hence the colour - and it is very hard to come by in Australian markets.  Lucky for me, my mother-in-law has been growing a patch of  the red stuff for some time and I frequently get to feast on this delicious dish during harvest time.  Other times of the year this recipe works just as well with regular English spinach although it is not as sweet.  There are minimal spices here as much is relying on the marriage of fresh juicy prawns and the natural sweetness of the saag. 
Ingredients
500g x Prawns, fresh cleaned and shelled
1 tsp x Turmeric powder, plus 1 tsp extra
Salt to taste
500g x Lal Saag or your choice of dark leafy greens
2 tbsp x Mustard Oil, substitute for a fruity olive oil
1 tsp x Mustard seed
1 x Onion, peeled and diced
2 cloves x Garlic, crushed
1 x Chilli, seeds removed and sliced finely
Directions
Sprinkle the turmeric evenly over the prawns and add a pinch of salt
Allow to stand for 5-10 minutes
Heat a tablespoon of oil in a wok and toss in the prawns
Lightly cook for about 3 minutes then remove prawns from heat and reserve
In the same wok add the other tablespoon of oil and allow to heat on medium
Add the mustard seeds and stir until they begin to crackle and pop
Follow with the onion, cooking for about 5 minutes
Now add the extra turmeric, garlic and saag folding through to combine
Place a lid on the wok and allow leaves to wilt for about 4-5 minutes
Now return prawns to the wok stir well to combine for 1-2 minutes
Add the fresh chilli and serve hot on a bed of steamed basmati rice.
"This is a very simple version of this dish but it does not discount from its delicious taste.  Check out one of my earlier posts called Silverbeet & Prawn for a more elaborate version that involves a lot more steps but the result is well worth it."

Tuesday, April 24, 2012

Sooji Halwa - Dessert...or even breakfast???

I must be feeling very nostalgic lately, since I keep making dishes that remind me of my childhood in India. This dish can easily be mistaken and served as a dessert to follow a nice curry, and it would probably go down well too. But my memory of Sooji Halwa, is eating it as a breakfast dish enveloped in soft deep fried puris. Think pancake like parcels with the sweet fragrant halwa inside. Sooji Halwa which is prepared with semolina is made very similary to porridge.  In fact, I remember my dad making it on its own for breakfast and calling it a Sooji porridge. Since being in Australia, I don’t think I have seen it being served at any Indian take-aways and I do not know why – I think it would make a perfect cheap breakfast.  In this version of it I have decreased the amount of liquid so that it is of a firmer consistency and I was able to put it into a plastic container, as a mould. It did get served as a dessert at a Nepalese friend’s house, since his name sounds a little like Sooji – and I told him I would make some for him some time. Hope you enjoyed it “Sooji Cracker”.
Ingredients
2 cups x Coarse Semolina
4 tbsp x Ghee, or 50g x Butter
1tsp x Ground Cardamom Seeds
1 stick x Cinnamon
¾ cup x Caster Sugar
2 cups x Water, boiling hot
1 cup x Milk, heated
½ cup x Thickened Cream
100g x Cashews/Almonds/Pistachios (your choice when it comes to the nuts, just chop them coarsely)
50g x Sultanas or Raisins (I didn’t use any in this recipe and found it wasn’t missed – by me anyway!)
Directions
Melt the ghee or butter on medium heat in a non-stick pan and add the cardamom and cinnamon
Fry for a few seconds then add the semolina and stir continuously so that it starts to roast the grains
After about 5 minutes the semolina will be nicely browned and very fragrant
Add the hot water and milk folding to combine into a thick porridge like consistency
Next add the chopped
Keep stirring for another 5 minutes then add the cream and mix well
At this point if you wanted to go the porridge way then add more milk or water to get it to the consistency you desire and serve immediately
If it is to be a dessert then remove the cinnamon stick and transfer to an appropriate mould
Cover and place in the fridge until firm and set
Turn the halwa out, onto a plate and cut into squares before serving
Garnish with an cashew or almond on each square for decoration
"Semolina is collected during the process of wheat milling.  Wheat grains are processed by machinery that removes the bran and germ. The starch that covers the germ breaks up during the process and is filtered to form semolina and other grades of flour.  It is very absorbent and can take on a lot of liquid when cooked."
"Halwa made from semolina can be found being made in many countries from Greece to the Middle East.  This recipe hails from the North India region"

Monday, October 3, 2011

Review: Indya Bistro, Nth Carlton.


Indya Bistro on Urbanspoon

While I am on the Indian cuisine high, I thought it fitting to post a review for Indya Bistro, a restaurant in North Carlton that I recently visited (and that isn’t a typo they really spell it I.N.D.Y.A – I think it flows with their modern Indian cuisine motto. We visited Indya Bistro early on a weeknight – how early?? Well, let’s just say there were no other diners there yet.  Indya Bistro has ranked highly in the local stakes and was voted Victoria’s Favourite Indian Restaurant in 2010.  I just had to visit to see and to taste, just what it takes to be given such a high accolade by People’s Choice.  It was time to check out what Modern Indian cuisine actually was. As part of a 7 course banquet we ordered a selection of entrées, a veg and non-veg main dish and dessert to cap off the evening.
For starters we were served a trio of dips accompanied with naan bread to do the dipping with.  The slightly unimpressive dips being Cucumber Raita, Mango Chutney and Lentils came in quaint ceramic bowls with teaspoons.  However I did feel a little short changed to discover that each bowl had about 3 meagre teaspoonsful of the dip, so literally 1 and a ½ spoonful and it’s over.
Thankfully, the next starter item, being piping hot Samosas had arrived.  The spicy potato filling was quite tasty but unlike those Samosas enjoyed at street eateries, where the pastry is flavour full and crispy like a biscuit, these were lacking in the crunch department.  Hardly impressed by this “Favourite” of the people, I hoped the upcoming dishes would have more lustre and give credence to the award.

Unconditionally the winner of the night was the Lamb Kebabs –  well spiced, delicately textured ground lamb, classically formed around a skewer, but served without it, just for that little bit of modernism – I think anyway!  These went down a treat and reassured me of good things to come.  The minced lamb was soft and had a welcoming mild Tandoori hint of that was just right.
Chicken Tikka is one of those dishes that you just have to love.  The success of this dish, for me, would be measured by the juiciness of the meat and it’s delicate balance of flavours from the marinade to the basting sauce it comes with.  I would like to say that Indya Bistro ticked all the boxes on this menu item but sadly this was not the case.  What was served was an overcooked and dry piece of chicken that had definitely not been given its due cooking process before it was plated and sent from the kitchen.
Entrées aside I was now somewhat anxious for our mains and I would like to think that you cannot go wrong with a serve of Rogan Josh and for something different Malai Kofta from the vegetarian side.  Now I may be mistaken, and it is probably going to take a few more visits to Indian restaurants to uncover what Rogan Josh is actually supposed to taste like.  The last three places including this visit has dished up a Rogan Josh with very thin runny gravy.  I recall cooking the dish myself and also enjoying my dad’s interpretation, which have both been a dish of boneless lamb pieces in a thick and spicy gravy, complimented with a slight tang.  Here was yet another version of Rogan Josh that just did not hit the spot.  While the lamb pieces were remarkably tender, I just could not enjoy the dish as a soup and where was the spice...nowhere to be seen!

The Malai Kofta on the other hand were quite delicate cheese dumplings with a little spice that were bathing in a bowl of cream – a little too rich in fact but tasty enough to tuck into. With the disappointment in the previous dishes I think it was safe to say I was not going to have a win tonight and this was only heightened by crusty stale textured rice.  Now I am not sure if we were unfortunate enough to get the scrapings from the batch but as a frequent eater of rice – this was hardly passable.  C’mon, it’s rice – a staple in India – How can you not get it right? At least the Roti was comforting enough to make up the carbohydrate component. 
Dessert was a couple of dainty little warm Gulab Jamun –  dumplings in syrup, and these satisfied the need for a sweet finale. 
As I left Indya Bistro I was still doubtful as to how deserving they were of the award for Victoria’s Favourite Indian Restaurant. I did not feel like I had feasted on Indian cuisine that night. My insides did not hum with fulfilment from a meal well-enjoyed that left a lasting impression on your taste buds. Perhaps I am ill-informed! Perhaps this is what Modern Indian cuisine is all about!!!          

Sunday, October 2, 2011

Butter Chicken - Murgh Makhani

Ask any discerning non-Indian diner to name their top Indian curries and this one is sure to be on that hit list.  Butter Chicken in all its bright orange glory is by far the king of curries for me, as serving it up guarantees a well-deserved pat on the back and smacking of the lips!  It is said that the dish was created by an Indian chef in the nation’s capital – Delhi.  It was here that Kundan Lal Gujral humbly created the first Butter Chicken and put it on the menu at the now famous Moti Mahal restaurant in Daryaganj, Delhi.  I caught an episode of Rhodes Across India, on the Food Channel, where UK celebrity chef Gary Rhodes visited the original birthplace of Butter Chicken and met with the restaurant staff.  As a result they happily divulged the secrets of their prized recipe and this here foodie on the other side of the world saw it right to snap it up and cook it at home – and now here it is finally on this blog page to be immortalised forever (well as long as the internet exists anyway!)
After mastering this you can say goodbye to buying bottles of so called Butter Chicken pastes, or sachets of powders that are supposed to turn out this delicacy, but produce coloured chicken lacking in all things “buttery” or “chickeny” to say the least.  I have eaten Butter Chicken or Murgh Makhani, as it is known in its hometown when I was in India, and when I first tasted the end product of this recipe – it really took me back.  I have since made it a number of times, and each time it does not fail to please me – and I am my worst critic - believe you me!
As with all special dishes you need to take your time i.e. once again this is not an after-work dinner that you can whip up from scratch.  There is at least an hour of simmering time and if you have not prepared the chicken beforehand, there is marinating and roasting time for that too.  I have already posted my recipe for Tandoori Chicken and it is notably the best place to begin this dish from.  Whenever I conjure up some tandoori magic I reserve a chicken or two for a Butter Chicken finale some time later.  So having said this if you make the Tandoori Chicken when time is not a factor, then you just may be able to dish some Butter Chicken up in just over an hour – after work perhaps, if you are game enough.  Either way it is well worth the reward, especially if Daryaganj in Delhi is not accessible to you.

Ingredients, to serve 4 
1 x Tandoori Chicken, prepared as per recipe and cut into pieces
1tbsp x Butter or Ghee to be traditional
2 clove x Garlic, chopped
5 x Cardamom, bruised
1 stick x Cinnamon
2 x Bay Leaves
3 x Whole Cloves
2 cans x Tomatoes, pureed in a blender
1tsp x Chilli powder
100g x Cashews, powdered into a paste with a little water
25g x Butter
1tsp x Cumin powder
1tsp x Garam masala powder
1tsp x Fenugreek seeds, grounds
1tbsp x Cream
Coriander to garnish

Method
In a heavy pot heat the butter or ghee
Add in the garlic, cardamom, cinnamon, bay leaves and cloves
Fry gently to release aromas, do not allow the garlic to burn
Pour in the pureed tomato and stir in the chilli powder
Bring to the boil then turn heat down and cover pot
Allow to simmer for 45 minutes,
Do not allow tomatoes to dry too much adding a little water if required
When tomato mixture has cooked down carefully turn it into a sieve over a bowl
Strain mixture well pressing through the sieve
Discard the whole spices
Give the pot a wipe and return to the heat on medium
Melt the butter then add the cumin powder and toast lightly for 30 seconds
Return the sieved tomato mixture to the pot
Stir in the cashew paste and mix well to combine all ingredients
Bring the sauce to a boil adding a little water if too thick
Place chicken pieces into the pot and turn heat down
Cook for 10 minutes stirring occasionally to prevent catching
Stir in the Garam Masala and Fenugreek powders
Cook for an additional 5 minutes then remove from heat
To serve swirl in the cream and garnish with chopped coriander leaves

"Best enjoyed with hot Naan breads or Rotis or simply on some steamed Basmati rice.  It is surprising how little butter there actually is in this dish despite its name.  The creamy texture comes from the pureed tomato as does the overall orange colour.  There is no need for additional cream but it does make it look pretty when serving.  This is truly my favourite dish to make from my Indian recipe repertoire."  

Thursday, September 29, 2011

Tandoori Chicken

Characterised by its fiery red colour and explosive hit of spices, Tandoori style food has etched itself onto the must-have dishes when dining at an Indian restaurant.  The name Tandoori derives from the clay oven that the food is cooked in, known as the tandoor.  The use of these ovens, that can reach extremely high temperatures, is widespread across the Indian sub-continent and also in the Middle East.  The cylindrical ovens are lit with a wood fire, usually at the base, and then allowed to heat up to such intensity that meat can cook within minutes when skewered and placed inside.  Tandoors are also used in producing Naan bread, and you will know when they are cooked this traditional way, as the Naans will be soft on the inside and have a crispy, charred and flavoursome exterior.  The principals of tandoori cooking are very much in line with that of convection ovens – to some degree.  In restaurants the meat or vegetables are marinated and then threaded onto metal skewers and then plunged into the furnace where they cook to smoky perfection.  The smokiness of the end result comes from the dripping juices from the food evaporating and infusing the food, as they splash onto the hot wood fire. 
I have dined on Tandoori at restaurants across India during my brief travels there and savoured every piece of chicken and lamb tikka kebab.  Here in Melbourne there are some good places that put a on a fairly comparable Tandoori chicken dish and some even keep the tandoors within view of the diners to heighten the excitement of the dining experience.  Like with most restaurant food I eat I like to emulate it in the home kitchen in the hope that it tastes somewhat similar and worthy.  Unfortunately I do not own a tandoor oven although, they are available to purchase - so I am taking donations….anyone!!! 
For a while I have tried making Tandoori Chicken in the kitchen oven, on the bbq and even on a grill plate.  While the marinade has been good and followed to the letter from Indian recipes – the end result falters in the taste department and I had almost given up.  That was until our backyard acquired a new resident – the Weber Kettle BBQ.  This spherical oven produces some very flavoursome roasts cooked above hot coals in what’s called the indirect method of barbequing.  This is when the coals are positioned around the meat and not directly below it, as a griller would have it.  It was this that inspired me to try cooking Tandoori chicken in this manner.  Combining whole chickens with a perfect blend of spices and an admittedly “cheats” ingredient, I had finally come up with restaurant worthy Tandoori Chicken that I have served up to my guests, and gotten major compliments for.  
The process is not exceptionally hard to do and the reward is remarkable.  This recipe yields about three whole Tandoori chickens and I keep at least one as a left over and freeze it to use later in a mouth-watering Butter Chicken recipe.  If you do not have a Weber at home, then the conventional oven will do – you just will not have the smoky flavour that’s all but the chicken will still be tasty – trust me!  Use the red food colour to give it that exotic look and you can’t go wrong.  In our family we actually consider Tandoori as a shade of red – like Scarlett and Magenta.  “Fake tanned bodies will get called Tandoori colour”.  Marinate this dish a day ahead for maximum taste.

Ingredients
3 x Chickens, kept whole with skin removed
250g x Yoghurt
3tsp x Cumin, powder
3tsp x Coriander, powder
2tsp x Garam Masala
1tsp x Turmeric
3 tsp x Ginger, freshly grated
6 x Cloves of Garlic, crushed  
2 x tbsp Tandoori Paste (This is my biggest cheat, as no matter how hard I have tried I have not gotten a better taste without the paste)
Chilli powder (As much or as little as you like)
Salt to taste
Red Food Colouring (after all if it ain’t red it ain’t Tandoori)
3 x Lemons, medium size

DAY ONE
In a large non-metallic bowl combine yoghurt with ginger, garlic and dry spices
Add the Tandoori Paste and mix well.
Adjust salt to taste then add the food colour.
Prepare the chickens by scoring the thighs, legs and breast sections with ½ cm cuts
Rub the marinade over the chicken and inside the cavity before placing a lemon in each cavity.
Allow to marinate overnight in the fridge.

DAY TWO (I will give instructions on how to cook the chicken in a conventional oven, however I did use my kettle BBQ in an indirect method which takes about 1½ hour until the meat is cooked through)
Preheat the oven to 220 degrees Celsius
Place the chickens onto a wire grill above a roasting dish to catch the drippings
Bake for 20 minutes on the high heat then turn oven down to 175 degrees Celsius and cook for a further 45 minutes.


Chicken is done when the juices run clear
Allow to rest for 15 minutes before carving it up
Serve with leafy greens, lemon wedges and a minted yoghurt for dipping